Are your images working for you? If not let me show you how to optimize your images for Pinterest.
Optimizing your images for Pinterest is one of the best things you can do to improve your Pinterest reach. This is an area a lot of bloggers and business owners do not put enough focus. Your content is great, your images are pretty and they get pinned but if they aren't optimized, you may not be found on Pinterest. It only takes a few extra minutes to optimize and have your images work wonders for your site.
Let me show you how to get more out of your pretty images.
-
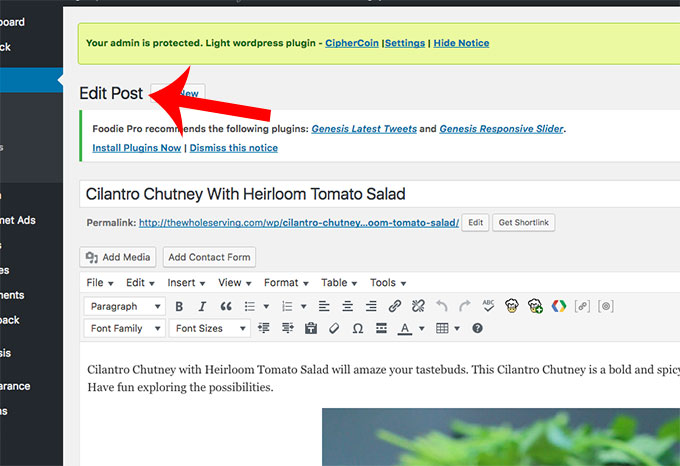
Step One: Open your post in the edit post mode.
-
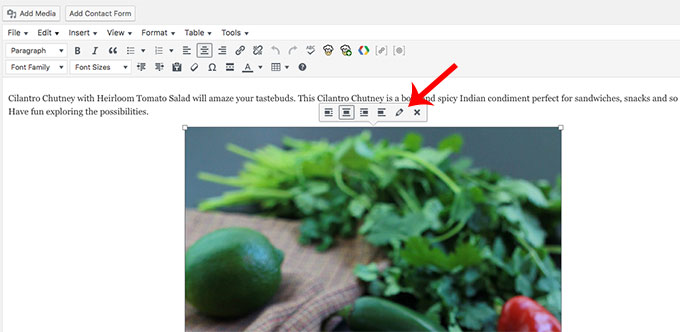
Step Two: Click on the image, when the edit box appears, click on the pencil icon.
-
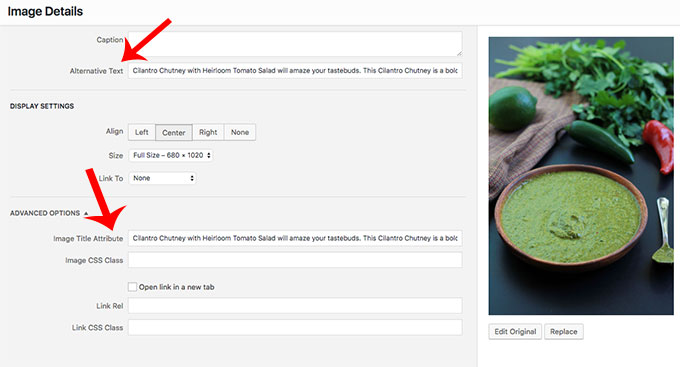
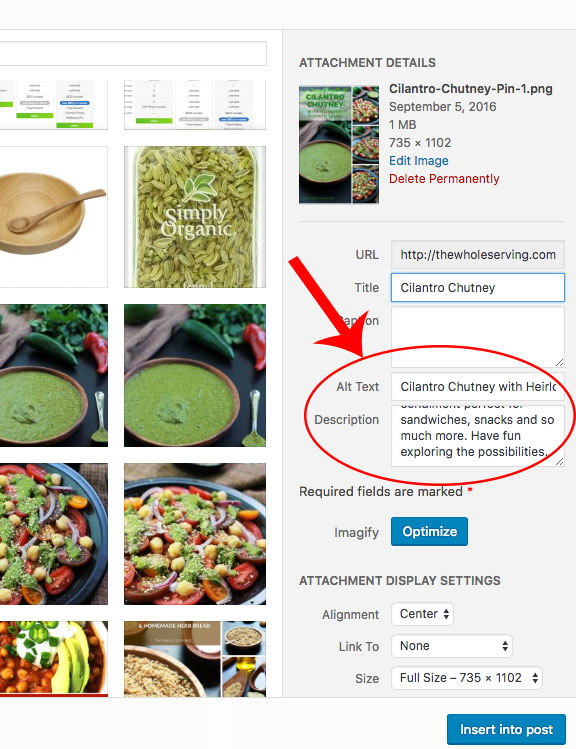
Step Three: The image details box will open. This is where you want to have a description to increase your click thru rate. You will insert the description in the alternative box near the top of the page and the image title attribute box near the middle of the page. I like to use the post title followed by a catchy description with keywords, and I end it with the link to my blog. Before exiting the image details box, copy the text you just entered, hit update and exit the box. Take the copied text and paste it in the rest of the images in your post and update or make each description different if you like.
-
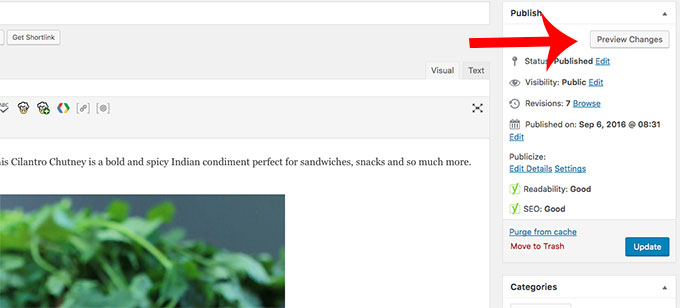
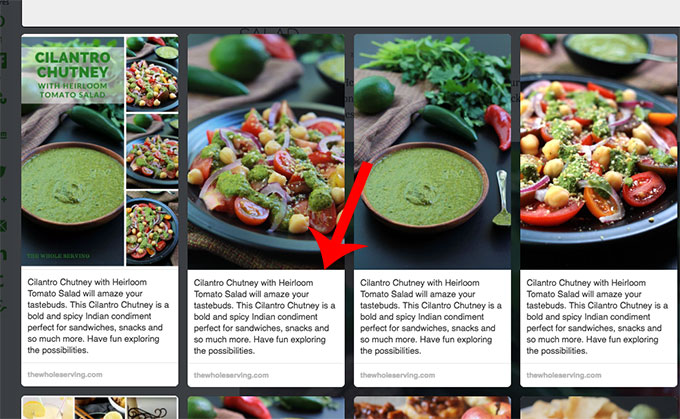
Step Four: When everything has been updated, click the preview button. Once the preview of your site had loaded, click your Pin It button as if you are going to Pin an image. When the collection of your post images are loaded there should be a description on every image.
-
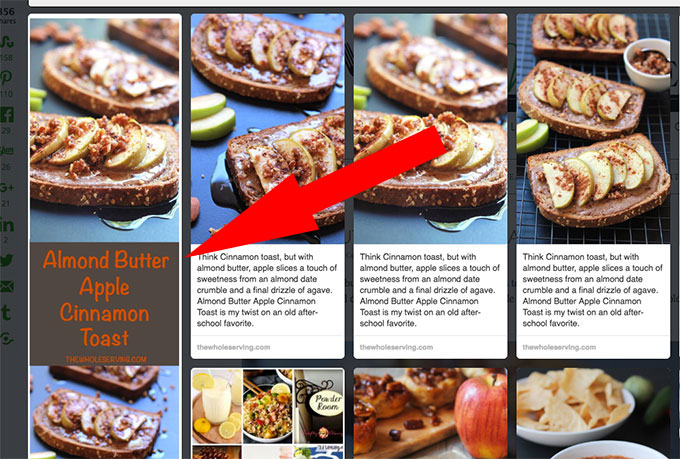
Step Five: Now check to be sure the images have the description you entered. This description with your keywords will help your Pinterest and Google SEO.
-
If you choose you can add your description to the images when uploading to your image library. Another great tip: if you have Yoast SEO plugin installed, you should have a green circle next to the image analysis statement.
-
Embedding Imaged For Pinterest Sharing: Long Pins get noticed on Pinterest, but I don't like them in my post. So I hide them but they will show as an option for pinning. Let me show you how.
-
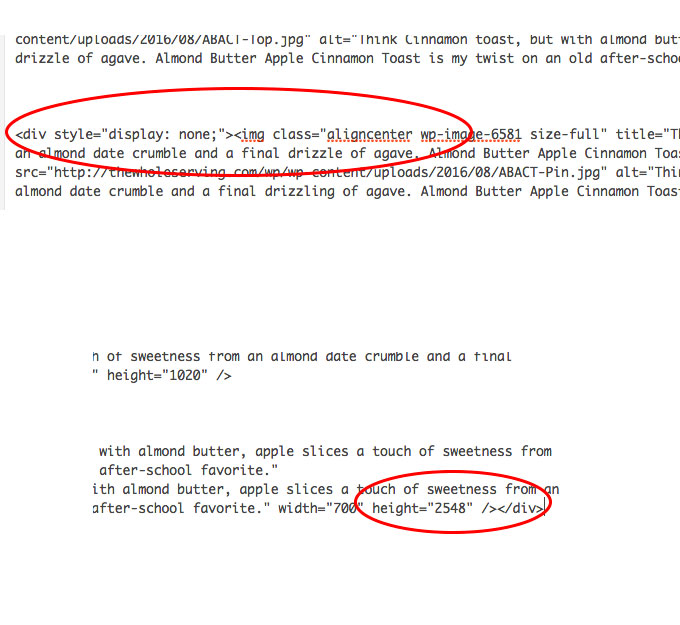
Embedding or hiding pins: Insert your long pin in your post while in the visual mode of your text editor, click on the text tab to switch to text mode. Locate the code for your image and insert the style code directly in front of it. The style code for hiding your image is: <div style="display: none;"> Insert </div> at the end of the image code if your pin image is not the final item in you post so you don't hide the next image of sentence. I generally insert my long pin at the very end of my post. Save everything and click back to the visual mode. Your pin image will be hidden and will only be visible when someone clicks the Pinterest icon. Click to preview changes as you did in step four to be sure your image is there.
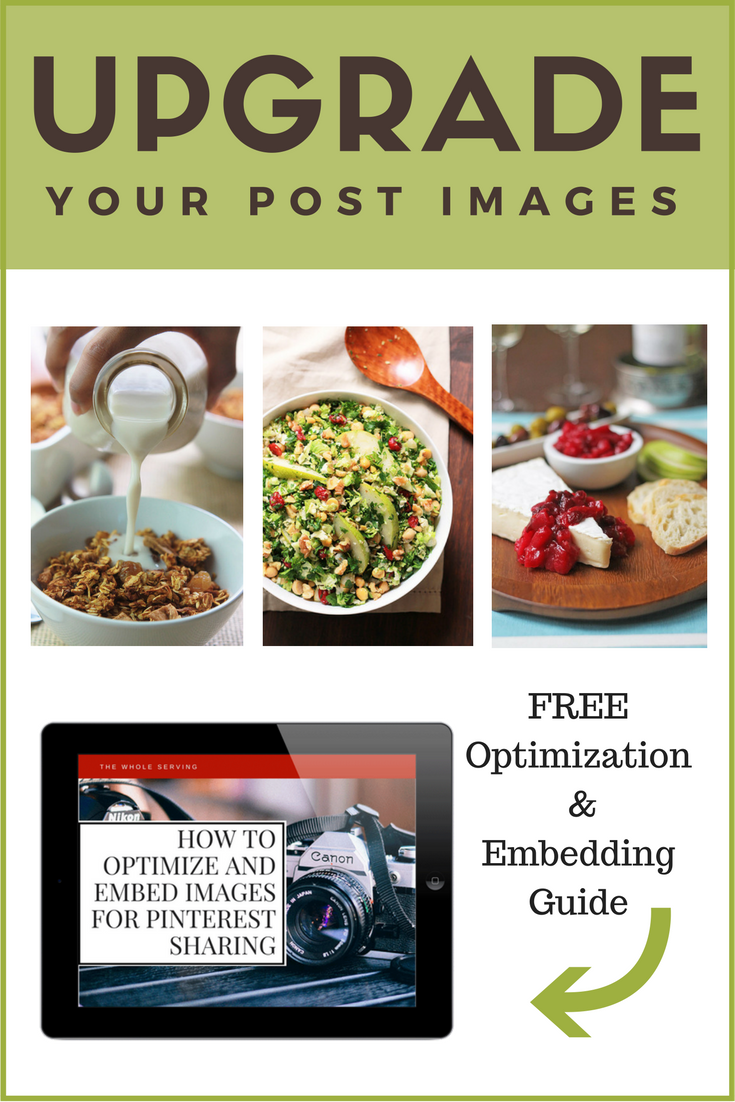
I hope you find all of this information valuable and it helps you improve your Pinterest SEO as well as your Google SEO. Click the image below to grab your guide.

Mary-the boondocks blog says
It is so important to have that ALT tag. I need all the help I can get when it comes to optimizing my images and my posts. Thanks for the great tutorial.
Melissa Ruddy says
Really great information. Did not know you could do that with short and long pictures. I need to get towork on my descriptions.
Meg | The Many Little Joys says
Thanks for the great tutorial on how to hide images. I've been wanting to learn how to do that.
Celeste says
Meg thanks for visiting and I'm glad you found this helpful.
Janet Vinyard says
Hi Celeste, Thanks so much for all this great information! I look forward to doing this to my images now that I know about this. Blessings, Janet
Jan Wild says
Celeste, thank you so much. This is just the information I have been looking for and now the Universe has delivered.
Celeste says
Jan I'm glad that you found the information you have been looking for, and I hope it helps.
Nikki Frank-Hamilton says
Celeste, I am amazed when I Pin an image that the ALT tag is not filled out completely. And this tutorial is needed by every blogger! It helps for Pinterest and SEO to do all these things!
I do mine a bit different so I can do all the images in the post at the same time. I load them all into the image editor when I am in my post, when I load them I make sure each image has a good Title. If the image doesn't show up in someone's browser the Title tells them what the image is. If someone is visually impaired their computer will read this title. Leaving this as IMG1212 doesn't help you. Then I type a description in the ALT Tag, copy and paste this image into the description box also. Some browsers will pull the title, alt tag or description, so I have all of these areas filled out.
Since I am in my image library I can copy and paste the same Alt tag and description into each image for the post and change the Titles, all in one fell swoop. Quick and easy and done! Plus, make sure that all three of these areas have your keywords for SEO to help you rank better and get found more easily.
Roseann Hampton says
Thanks so much for this post, it is very helpful!
Celeste says
I'm so glad you found it helpful. These are things I wish I knew when I first started blogging.
Valerie says
Very helpful!
Celeste says
Thanks for visiting Valerie and I'm glad you found this helpful.
Cathy Lawdanski says
Celeste - I have heard of hiding the pin for a long time, but never knew how to do it! Thanks so much for this great post!
Celeste says
You are so welcome Cathy, I'm glad this was helpful.
Alexis says
What an awesome post. As a new blogger this is super helpful. Thanks so much ! Visiting in from waywow
Celeste says
Thanks Alexis, This is information wish I had when I first started blogging, I'm so glad you find it helpful.